App developers have a fierce competition if we take into account that there are millions of apps (Android and iOS) for users to pick from. While this post is not about app marketing, one of the most important recommendations I usually have for developers is to create an app website that showcases their creations. Relying solely on the Google Play app store listing is missing out on app promotion opportunities. To name a few, here’s some advantages to having an app website rather than relying solely on Google Play’s listing (or Apple’s appstore):
- Control. On Google Play you have a lot of restrictions over what you can do with your app listing. Text limitations (title, description), formatting (i.e. you cannot have active hyperlinks), template and a lot others. On your own website you are in full control to showcase what and however you want.
- Added SEO value. Having an website helps you pick up more users. With a Google Play listing you mainly target visitors on Google Play. When you have your own website, you also target users that visit the regular Google web search.
- Backup. There are numerous stories with devs that got their app/game removed from Google Play for any number of reasons. With your own website established you can quickly have an alternate way of helping your users get the app.
- No competition. On Google Play your app listing page has at least a few other suggestions from your competitors. So whenever you send users there, they might discover your competitor’s app instead. Not happening with your own site.
Since this post is about adding SSL to your app website I won’t go into more depth, but I strongly advise setting up an website if you haven’t already. And I strongly advise you to go for a WordPress theme when setting up your app website, mainly because you already have a strong platform in place. For a few bucks you can get a premium WordPress theme suitable for showcasing your apps/games and you’re all set.
Be sure to get a theme that’s responsive, because most of your app website visitors will be smartphone users. Not to mention that mobile friendliness is a ranking signal, meaning Google will favor those when showing results for mobile visitors.
Another recently added ranking signal is adding an SSL certificate to have your app website accessible via HTTPS. That’s true, if your app website is accessible via a secure HTTPS protocol, your site is favored in search results when compared to a non-secure site. In fact out of all web searches at least 53% off the first 10 results show an HTTPS website. There’s no reason why you shouldn’t do it especially since it’s not very difficult to do so.
Here’s a quick tutorial on how you can add an SSL certificate to your WordPress-powered website and what you should do after it’s added:
1. Get an SSL certificate. You need to purchase an SSL certificate, and the first place I’d look is at your current hosting company. Most of these have partnerships with major SSL providers (GeoTrust, Comodo) and they have better pricing. I would recommend getting it from your host as these usually also give you an easier way to set them up. If you are technical though, you can get a free SSL certificate and install it manually. Letsencrypt, SSLforfree, InstantSSL and even Comodo offer free SSL certificates. The only downside is that these usually expire after 3-6 months (not an year as the others) but if you put a reminder you are good to go.
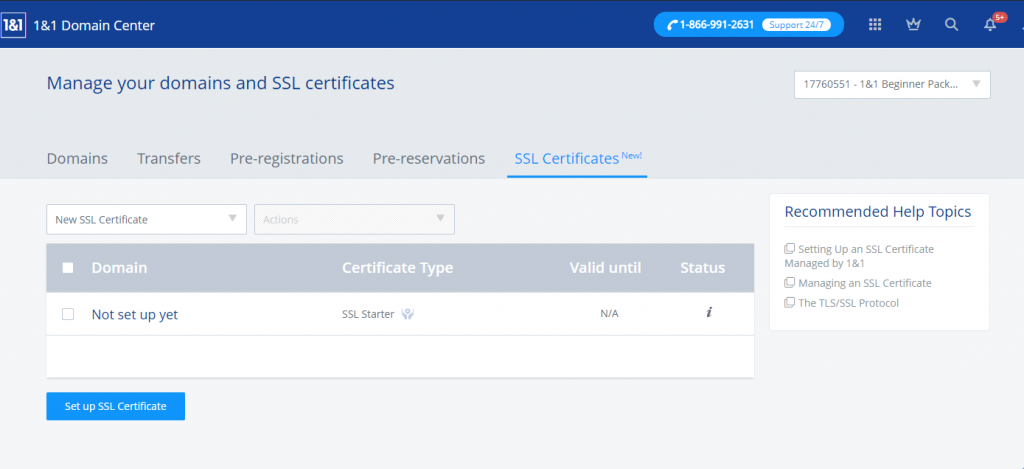
I’m using 1and1 as my hosting provider and they offer SSL certificates that are quick to install. Quick as in you add a few details and you’re all set, nothing to select/upload manually. Here is a quick overview on how to set up the SSL certificate for a domain in 1and1:
- Just go to the SSL Certificates and click on Set up SSL Certificate

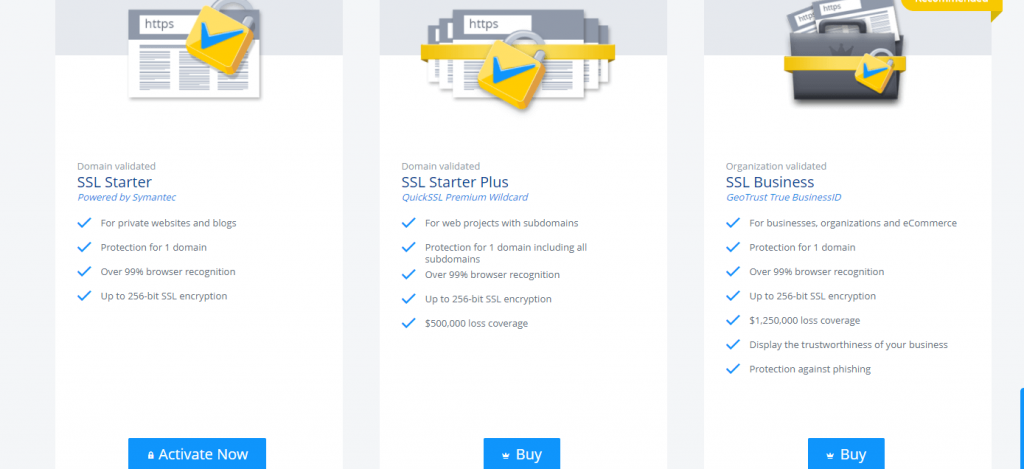
- Pick a certificate type (usually the regular 1 domain certificates)

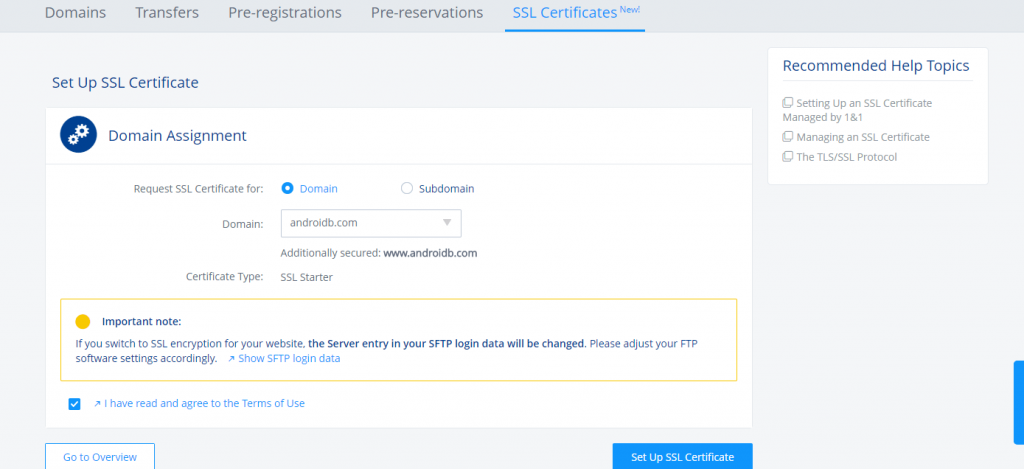
- Select the domain you want to request the SSL certificate for and choose to Set up the certificate

- That should be it. You will see the domain with its associated SSL certificate in there in couple of minutes if there are no problems. In my case there was an error saying that “The security check performed by the certificate authority on your SSL certificate has failed.” due to the domain name, but after contacting Geotrust it got solved.
2. Solve mixed content errors. Usually setting up the SSL certificate takes only a few minutes, and the easiest way to verify that it’s set up is to visit your website’s URL with https:// in front of it. If the certificate was installed the website will pull up. Now it’s time to check the HTTPS version of the site for errors. The idea with HTTPS is that all external scripts loaded on a particular page must be loaded via HTTPS and not regular HTTP. If you receive a mixed content warning you can easily verify what script/resource wasn’t loaded via HTTPS and correct that.
Google has an entire section dedicated to mixed content warnings here but the easiest way is to fire up the Inspect console in Chrome (or Firefox) by pressing F12 and then see exactly what resource needs to be loaded via HTTPS, just as in the example below:

Once everything is corrected your browser will show a nice green Secure icon in your URL bar and it’s a sign you can move to the next step.
![]()
3. Change the URLs. If you are using WordPress this is the step where you need to replace the installation URL with the HTTPS version. This will update your entire site to serve the HTTPS url if plugins are correctly written and use relative URL mentions rather than absolute ones. If you have a regular HTML site you can do a Search/Replace to change the protocol. With WordPress I do take an extra step and install a Search & Replace plugin that will allow you to search within all tables of your database for the full HTTP url and replace it (be sure to backup first). This way you ensure that at least on your site every URL served that points back to it goes to the HTTPS version.
4. Do HTTP to HTTPS redirects. Even if you did changes to your URLs, you’ll still get visitors to your regular HTTP links and to avoid that you need to do some 301 redirects right in the .htaccess file. For regular users when they visit the old HTTP url they’ll still be served a page without noticing differences, however the 301 redirects are vital for search engines. Google (and most other search engine) treats the HTTPS version of a URL as a new page and only the 301 redirects help pass the ranking from the old HTTP version.
You can do the redirects directly in the .htaccess file, and it should look like this:
# BEGIN HTTPS Redirection
<IfModule mod_rewrite.c>
RewriteEngine On
RewriteCond %{SERVER_PORT} !^443$
RewriteRule ^(.*)$ https://%{HTTP_HOST}%{REQUEST_URI} [L,R=301]
</IfModule>
# END HTTPS Redirection
This should be the first thing in your .htaccess file, above the other WordPress redirect rules. Basically what it does is it will “tell” the server that whenever a non-HTTPS request is done (via a port different from 443) to serve it the url with HTTPS in front of it. Be sure to have a backup of your old .htaccess file and once you add the rules test your site. Some hosts have different configurations and might throw 5xx server errors.
5. SEO changes. From an SEO point of view the most important part of switching to SSL is to have redirects that work properly and that are 301. However, there’s a few other things you have to consider for SEO when doing the switch:
- Verify your sitemap, if it is created by a plugin then the new urls will already be in place, if not you’ll need to re-create it with the correct protocol.
- Add the HTTPS version to the Google Webmaster Tools dashboard. Google sees the HTTPS site as a different one than HTTP so you will need to add the new property as well. This way you’ll be able to re-submit the sitemap, see how the traffic changes and manage your site. Do the same for Bing Webmaster Tools and why not even Yandex – just that in here you won’t need to re-add the HTTPS version, just to a Site Move as you see in the screenshot below.
- Update your robots.txt file to include the correct link to the new sitemap (with HTTPS in front), and also hreflangs/canonical URLS if you use those. If you don’t know what they are then don’t worry, but if you do be sure to update those too.
- Update your Google Analytics settings for the site you switched to HTTPS (small change in settings) and be sure to add an annotation to better track traffic changes. If something goes wrong, you can pinpoint to the annotation date to be sure if this was the culprit.
- Update social share counts. When you switch to HTTPS any social sharing/social comments you have will be gone. But some sites have tools to allow migrating or following redirects. For instance if you use Disqus comments, they have a Tool that will follow 301 redirects and pass on the comments. With Facebook/Twitter is a bit more difficult, but it can be done if it’s so important.
- Use a crawler. Check your brand new HTTPS website with a crawler to see how things are looking. I use an old desktop program called Xenu to crawl the site, but you can basically use any other online tool just to verify that redirects work ok and that there are no hidden issues.
That should be for now. Moving to HTTPS is not a very easy thing to do but in my opinion it can give you a small seo boost that can differentiate you from your competitors. And at one point all browsers will show a warning in the URL bar that the connection is not secure, so better do the change now than later. If you have any suggestions, comments or anything just drop a comment and enlighten us too!


